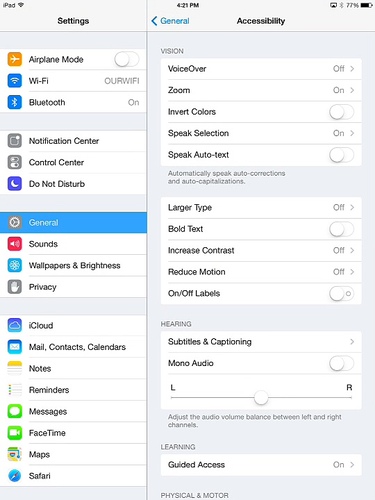
One of the underestimated parts of using an iOS device is that Apple has built in some powerful accessibility features for users who may have impairments that prevent them from using devices traditionally. In the education environment, these features can be a powerful tool to use with all students. All of these features can be found by going to Settings-> General-> Accessibility. Here is a list of some of the features that may be helpful in the classroom.
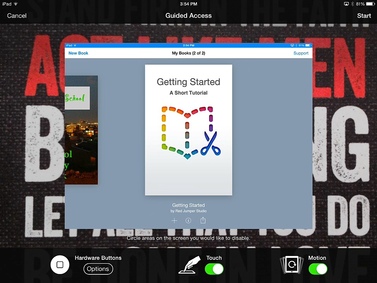
1. Guided Access - Guided Access allows the iPad to be locked to an app where the user cannot leave the app. The hardware buttons on the iPad are disabled and prevent the user from leaving the app without a passcode. This could be useful for setting up an app in a station, especially in the single iPad classroom. To engage Guided Access, first go to Settings -> General -> Accessibility and make sure that Guided Access is turned on. You will be required to set a passcode to use it but you can wait to do so until the first time you engage Guided Access. To start Guided Access, triple click the home button and you will see a screen like the one below. From this screen you can turn off all touch and motion orientation and even circle areas where you want touch interactivity to be disabled. Press Start and then Guided Access will be enabled. To leave Guided Access, triple click the home button and enter the passcode to disable.
1. Guided Access - Guided Access allows the iPad to be locked to an app where the user cannot leave the app. The hardware buttons on the iPad are disabled and prevent the user from leaving the app without a passcode. This could be useful for setting up an app in a station, especially in the single iPad classroom. To engage Guided Access, first go to Settings -> General -> Accessibility and make sure that Guided Access is turned on. You will be required to set a passcode to use it but you can wait to do so until the first time you engage Guided Access. To start Guided Access, triple click the home button and you will see a screen like the one below. From this screen you can turn off all touch and motion orientation and even circle areas where you want touch interactivity to be disabled. Press Start and then Guided Access will be enabled. To leave Guided Access, triple click the home button and enter the passcode to disable.
2. VoiceOver - VoiceOver gives the user the ability to hear what is on the screen. It can be a little tricky to navigate at first but could be most useful for students who need to have large amounts of text read to them. Scroll to the bottom of the Accessibility features to the Accessibility Shortcut and make sure VoiceOver is selected. To activate, click the home button three times (if you enabled Guided Access previously, it will ask what you want to do when you triple click the home button). When using VoiceOver remember that the first time you tap, the reader tells you what is selected. Tap twice to make the selection. For reading, you can launch a reading app, select a book or PDF and then enable VoiceOver to begin hearing the text read to you.
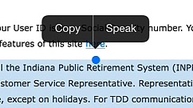
3. Speak Selection - Speak Selection is the 4th option under the Vision category of Accessibility features. When Speak Selection is turned on, you can select text on a page and when the Copy, Paste, Cut, etc. appear, Speak will be one of the options you can select. Once selected the iPad will begin reading the text you've selected on the screen. By selecting the Speak Selection option in the Accessibility features you can turn the feature on or off, change the voice, adjust the speed, and turn on word highlights which will highlight each word as they are read (a great feature for struggling readers). This feature is good for reading text on websites or helping students sound out words that they may not know.
3. Speak Selection - Speak Selection is the 4th option under the Vision category of Accessibility features. When Speak Selection is turned on, you can select text on a page and when the Copy, Paste, Cut, etc. appear, Speak will be one of the options you can select. Once selected the iPad will begin reading the text you've selected on the screen. By selecting the Speak Selection option in the Accessibility features you can turn the feature on or off, change the voice, adjust the speed, and turn on word highlights which will highlight each word as they are read (a great feature for struggling readers). This feature is good for reading text on websites or helping students sound out words that they may not know.
4. Zoom - The 2nd option under the Vision category is Zoom. When Zoom is enabled, you can zoom in on anything on the screen. If you tap with three fingers once on the screen, it will automatically zoom in on the area where you tapped. If you drag around with the three fingers, you can move around the zoomed image. Tapping with three fingers again will return to normal size. You can also incrementally zoom by tapping with three fingers and swiping up to zoom in smaller increments. One additional feature is that using zoom will show while displayed to an Apple TV. It is limited but can provide additional zoom where pinching to zoom is not adequate or on screens or apps where you cannot pinch to zoom.
5. Other features - There are several others features available such as changing the text size, inverting colors (students like to do this - but you can fix it here), adjust home button click speed, change the contrast, adjust sound, attach adaptive accessories and more.
5. Other features - There are several others features available such as changing the text size, inverting colors (students like to do this - but you can fix it here), adjust home button click speed, change the contrast, adjust sound, attach adaptive accessories and more.
Some of the additional Accessibility features
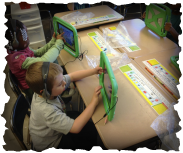
It's important to remember that while these may be tools originally intended for adapting the iPad to various needs, these tools can be used by everyone and they can be beneficial in the mainstream classroom as well as with special education classrooms. I hope you will take a moment to try these features and explore how you might use them in class. I would love to hear of some ways you have used these or some that I may not have addressed. Let me know in the comments or on Twitter @ipadjeff.

 RSS Feed
